![[Most Recent Quotes from www.kitco.com]](http://www.kitconet.com/images/quotes_special.gif)


I'd often wanted to know how to sink my own threaded hole and make a little threaded screw to fit into it. I'd read books that were old, out-of-print and new, but they all seemed to give me only half the information I needed. I looked on websites and found the information to be partial then found a variety of charts and diagrams on the internet, all meaning little to me. I've been asked so many times how to use these things and asked so many times how you're supposed to know which bits to use with what parts....that I bit the bullet and bought a set for about £45 ($69) in order to learn. Actually finding a complete set that I could afford or didn't look cheap and badly made, was another mission in itself. So I'm sharing what I've learned with you;
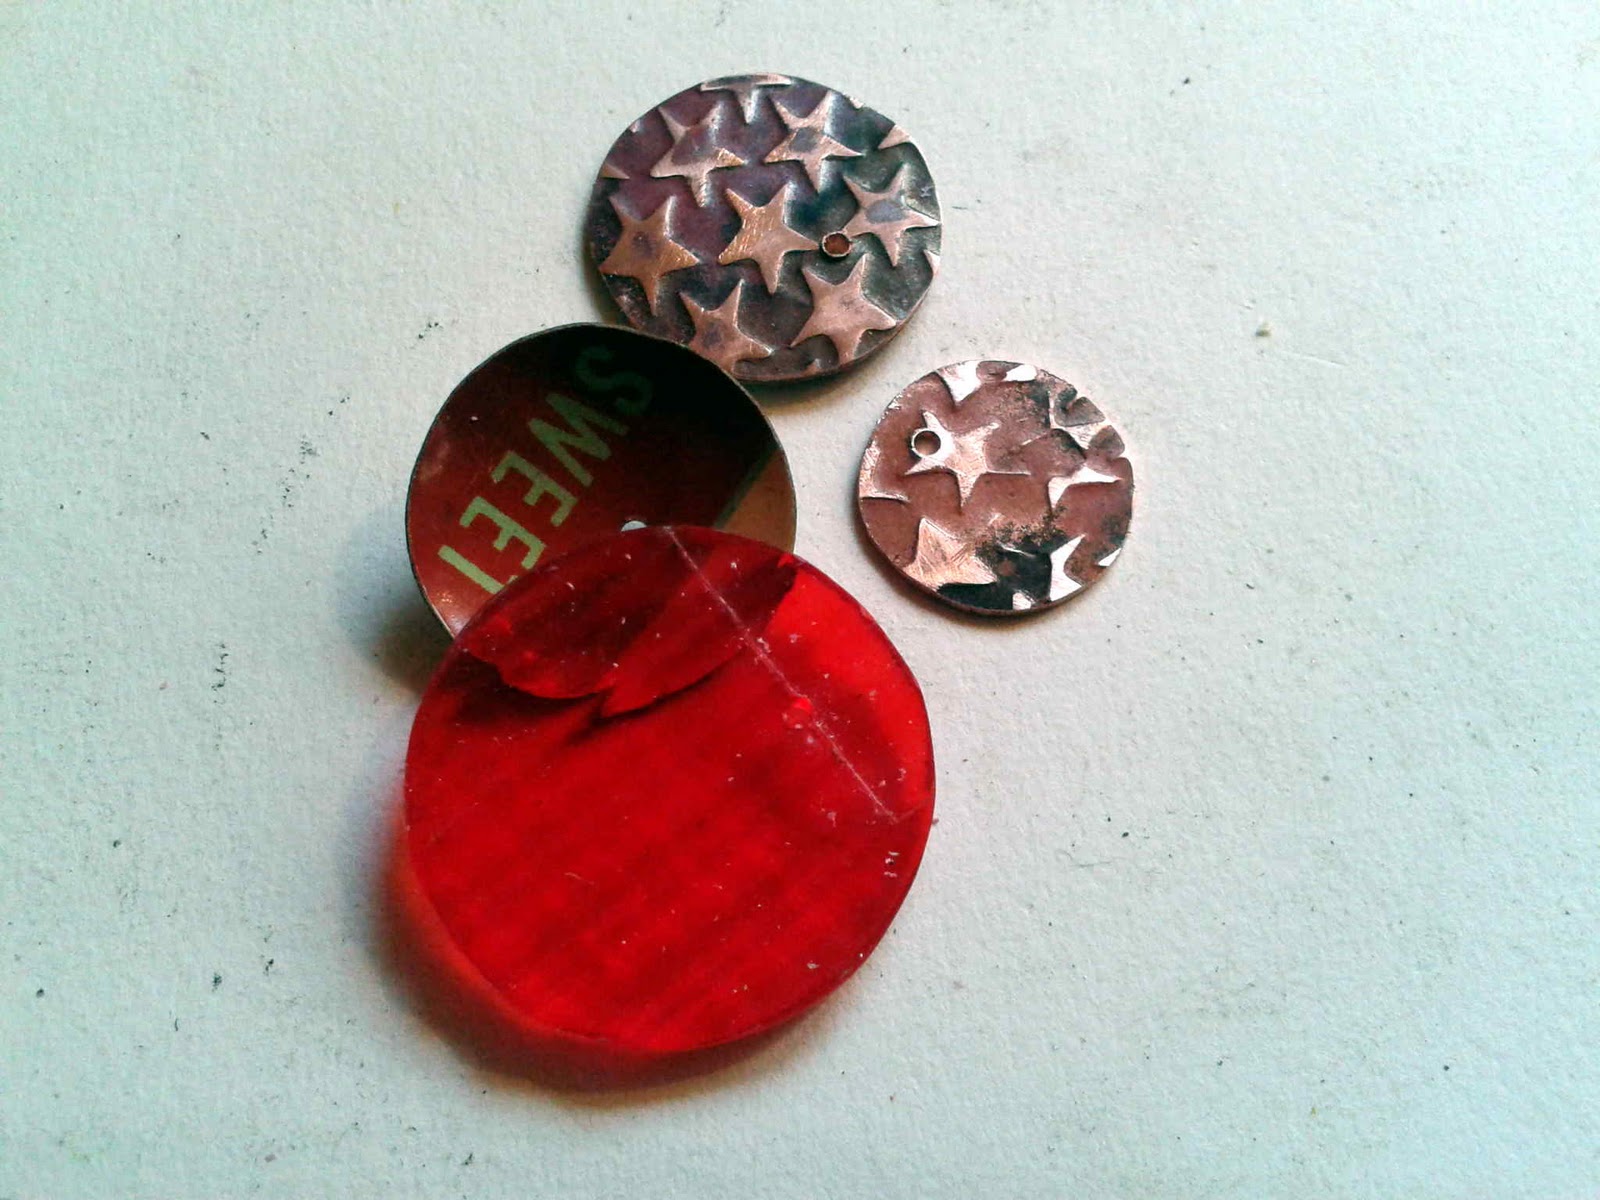
Above are the 4 pieces that I want to screw together. Two pieces of copper, one of old tins, one of perspex.
BA Size
|
Diameter of wire
(mm)
|
Diameter of wire
(inches)
|
Diameter of hole
(mm)
|
Diameter of hole (inches)
|
12
|
1.3
|
0.051
|
1.05
|
0.041
|
10
|
1.8
|
0.071
|
1.4
|
0.055
|
8
|
2.25
|
0.089
|
1.8
|
0.071
|
6
|
2.85
|
0.112
|
2.3
|
0.091
|
5
|
3.2
|
0.126
|
2.65
|
0.104
|
4
|
3.6
|
0.142
|
3.0
|
0.118
|
3
|
4.1
|
0.161
|
3.45
|
0.136
|
2
|
4.8
|
0.189
|
4.0
|
0.157
|
1
|
5.4
|
0.213
|
4.5
|
0.177
|
0
|
6.0
|
0.236
|
5.1
|
0.201
|
ISO thread size
|
Diameter of wire
(mm)
|
Diameter of wire
(inches)
|
Diameter of hole (mm)
|
Diameter of hole
(inches)
|
M1.6
|
1.65
|
0.065
|
1.26
|
0.050
|
M1.8
|
1.85
|
0.073
|
1.45
|
0.057
|
M2.0
|
2.05
|
0.081
|
1.6
|
0.063
|
M2.5
|
2.6
|
0.102
|
2.0
|
0.079
|
M3.0
|
3.1
|
0.122
|
2.5
|
0.098
|
M3.5
|
3.6
|
0.142
|
2.9
|
0.114
|
M4.0
|
4.1
|
0.161
|
3.3
|
0.130
|
M4.5
|
4.6
|
0.181
|
3.8
|
0.150
|
M5.0
|
5.1
|
0.201
|
4.2
|
0.165
|
M6.0
|
6.1
|
0.240
|
5.1
|
0.201
|
Above are two charts, one of which you will need to refer to depending on whether you work in "BA" or "ISO" threads. As I understand it, the ISO system is what is most commonly used today across a wide variety of applications, BA is an older system but the main difference is that the depth of cut and angle of the thread is less extreme than on an ISO thread....so if a screw is a little helter skelter at the fairground and the slide twisting around the tower is the thread itself, then how much the twisting slide actually sticks out from the tower and the steepness gradient of the slide, is known as the "pitch". The pitch is smaller on BA threads, which are used on really tiny srews like those on your spectacles. This is more appropriate apparently for using with soft metals like silver, as the pitch is less fragile (doesn't stick out so much and less steep) so less liable to twist or shear off. I could not find a BA set that I could afford so I thought "what the heck" shrugged my shoulders and went for an ISO set. You can buy taps and dies seperately, they are fragile and easy to break but I had no idea what I wanted, neither could I find a tap & die wrench to purchase seperately.

Here are the dimensions of the pieces, I'm using ISO. I had some more or less 2mm wire in stock so looking at the chart (I've highlighted the bit I looked at) I could see which tap and die size I needed to select. The wrench came with a circular 'washer' which is removable and is for holding the smaller taps and dies.

I have removed the washer (shown above with a smaller size die so you can see what I mean) and inserted the M2.0 that I needed into one of two tap adapters that came in the set (look again at my first picture at the top of this post, there are 9 dies, 18 taps {2 of each}, 2 tap adapters, 1 wrench and a die adapteradapter (one adapter is for the M1 sizes and the other is for the M2 sizes), then making sure it's in nice and vertical, tighten the screw with a flat-head screwdriver.

Next, I took the copper disc that I wanted the thread cut into and taped it onto a block of wood. I had previously drilled a hole with a 1.6mm drill bit (see the chart again). The metal part should not be less than 2.5mm thick, this piece was about 3mm thick. Slowly and carefully I turned the wrench clockwise with a little pressure after having first applied a bit of lubrication on the tap (I only had wax but oil is more appropriate). I was careful to keep the tap perpendicular to the piece I was cutting into. I turned one whole rotation then turned back out half a rotation to let out the swarf. I kept on going in this way until I had cut a thread right through the disc.....it took about 5 minutes.

Hopefully, if you look closely you can see the thread cut into my disc.

Next, I needed to cut my wire so that it became a screw. I picked up the M2.0 die (see the chart). You can see how one side has the size printed onto it and the other might be plain flat or dished. Notice the notch in one side of the disc for locating against the screw in the wrench.

I needed the adaptor for holding the die which just pops in. I inserted the die and tightened the screw, you can see above the printed numbers just peeking out from under the adaptor. Notice that tightening the screw would make the centre of the 'clover leaf' squeeze down to a smaller size, the centre is where the cutting thread is.

Next I inserted the wire into a vice, making sure the wire was vertical. Then with the printed side of the die facing up I fitted the other side onto the wire in the centre of the 'clover leaf'. This side of the die hole is slightly champfered to accept the wire. Then I started to turn the wrench clockwise and after quite some considerable time, got absolutely nowhere. After lots of faffing about trying different things and wondering if the die, my digital callipers or the chart was inaccurate, I found in one of my books the instructions...."the wire needs to be just about able to fit into the die before you tighten the screw"......not exactly engineering accuracy talk, so I drew the wire down to a narrower gauge which just about almost not quite fit the die, down to 1.80mm, even though the chart says the wire needs to be 2.05mm. Trying again, the die cut beautifully, one turn of cutting, half a turn back to remove swarf and lubrication on the wire...over and over again. I still don't know why the original thickness of wire was too much, as all charts have the same number info on them, perhaps I squeezed my callipers too tight on the wire....

You can see that I've cut quite a way down the wire and the start of the wire is now screwed up out of the top of the die.

Above you can clearly see the wire has now got a thread cut onto it. How about that!

I sawed a section of the wire off leaving an uncut couple of mm at one end then soldered the uncut end to a head. I soldered that end on with a gap of no thread because I didn't want solder flowing up the thread and filling it up. The other end I slightly rounded off with a file and emery paper so that it feeds nicely into the threaded hole we cut earlier.
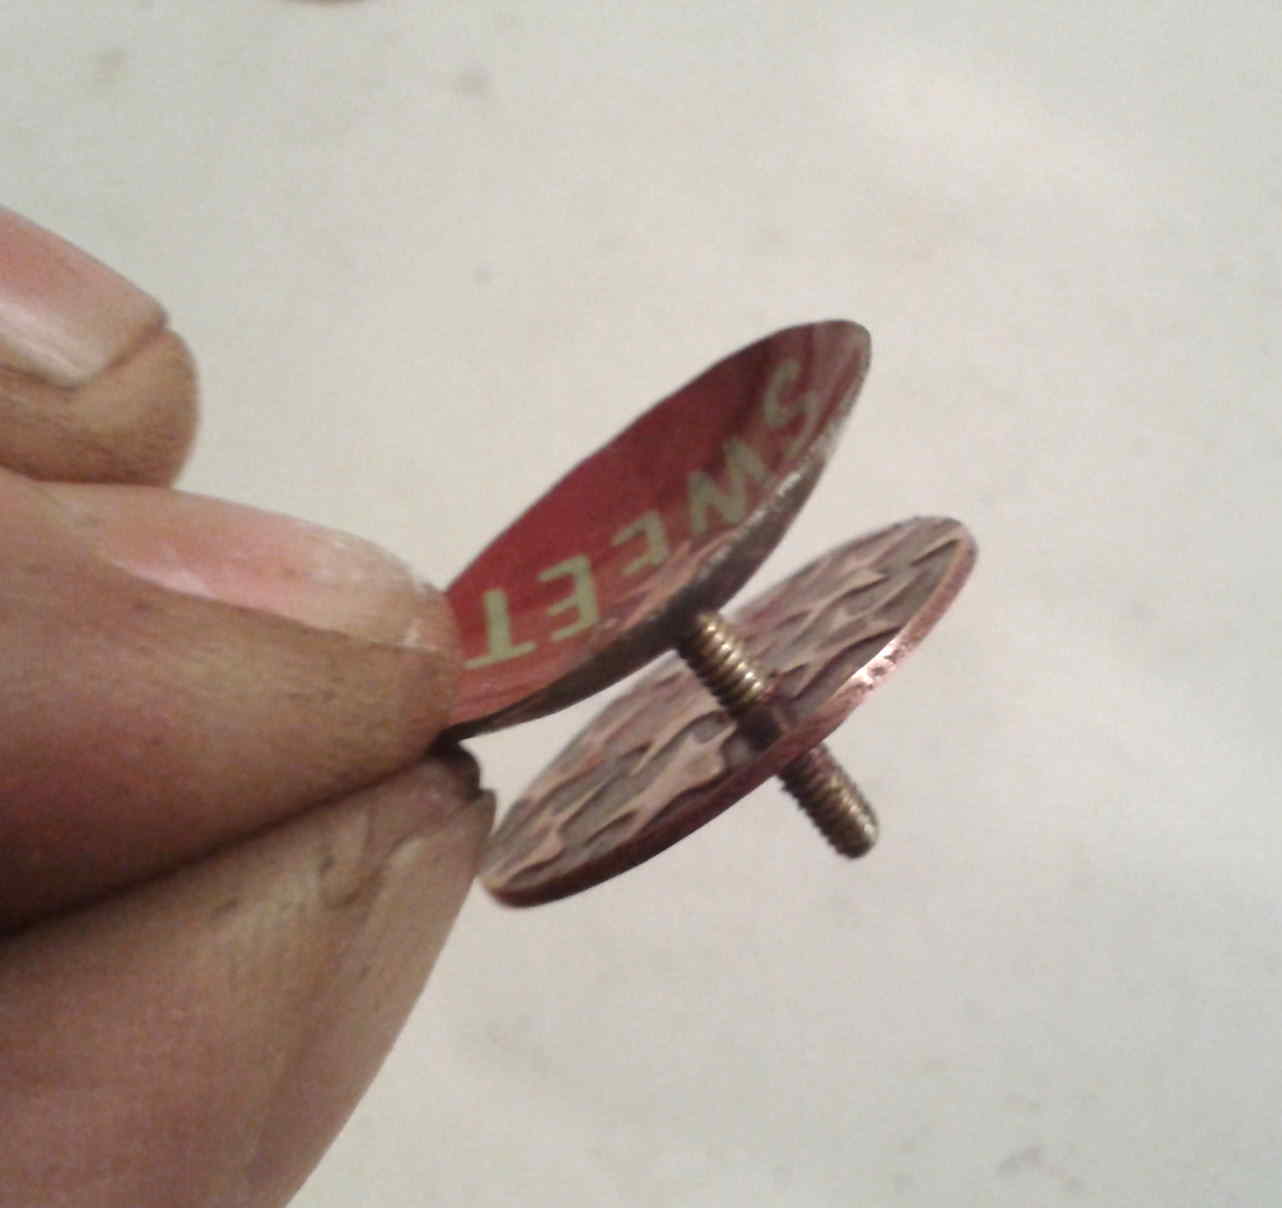
A moment of triumph, the screw threads nicely into the disc. It threads through an uncut hole in my bit of dished tins material....

...and through my perspex disc which is also cut with a threaded hole, then into a threaded disc of metal at the back. Hurrah!
Great. But what if you want to cut a threaded hole which doesn't go all the way through your material? You'd be using a thicker material for starters. The hole would be known as a "blind" hole. Ah, well you can see that the taps I have used are tapered, so how would they cut all the way down to the 'bottom' of a hole? You would need to buy taps called 'bottoming' taps, also known as 'plug' taps in the same size as the tap you use to cut most of the hole, so in the case above I would have had two or three plug taps in size M2.0, each tap would have a taper which is less severe than the one you use before it and so gradually cuts a thread into the last few mm of the hole you have drilled. I have seen taps for sale called "plug taps", so if I ever use any of these I will show you what happens.
3 comments:
Lovely tutorial. Thanks for sharing.
Hi,
It is always impotent to understand which is the perfect taps and dies for different products. It is the most important factor for repair works.
taps and dies
Chers amis, nous avons récemment rénové notre nouvelle maison, mais la sélection d'une tête convenable vraiment dur. Ma sœur m'a dit que beaucoup de familles utilisent maintenant Robinet LED, mais je crains était la vie ne tarde pas. Je préfère encore les antique robinets, Mitigeur douche et Accessoires salle de bain sont une bonne lecture. Je vous souhaite une expérience d'un ami peut me donner quelques conseils. Merci.
Post a Comment